Have you discovered knitting as a new and worthy hobby but don’t know where to start? Then you are in luck since we have made a complete guide on how to knit a sweater for beginners. So, check this out and make your first knitted sweater like a pro!
Stitches Needed for Knitting a Sweater
Before jumping to the knitting tutorial, you first need to know the basic stitches you need to understand every part of the tutorial easily. This will save you time and help you easily understand the tutorial. So below are the basic stitches you must learn to knit a sweater.
Cast on
Cast on is an essential stitch you should know because you can’t start knitting if you don’t cast on your yarn. Basically, in a cast on, you first do a slip knot and make loops on your left needle, which will act as your base for knitting.
These loops will be your guide on how long your stitches will be. For reference, most adult sweaters use a specific number of stitches as a starting base to achieve the correct size.
There are different types of cast on you can use, but most knitters use the Longtail cast because it is easy, simple, and perfect for beginners. To give you a better view, here is a visual guide from Sheep & Stitch on how to do a Longtail cast on.
Knit Stitch
If you have basic knowledge of knitting, you’ll know the knit stitch is crucial, often considered its foundation. You can’t complete a knitting project without learning and applying this stitch to your work.
Basically, a knit stitch is done in five simple steps.
- First, hold the pair of knitting needles with the left needle having a complete cast on and the right needle empty.
- Grab the right needle, and insert it into the first cast on stitch on the left. Make sure you insert it from front to back.
- Next, make a loop by holding the yarn tail and wrapping it counterclockwise around your right needle. Check if you wrapped the yarn in front and not from the back.
- With the yarn on the top, slightly slide down the right needle and catch the yarn with the tip of your needle, then slide it through.
- Lastly, flick off the first loop on the left needle and once the stitch is good, repeat the steps on the following loops until you are done knitting all the stitches on your cast on.
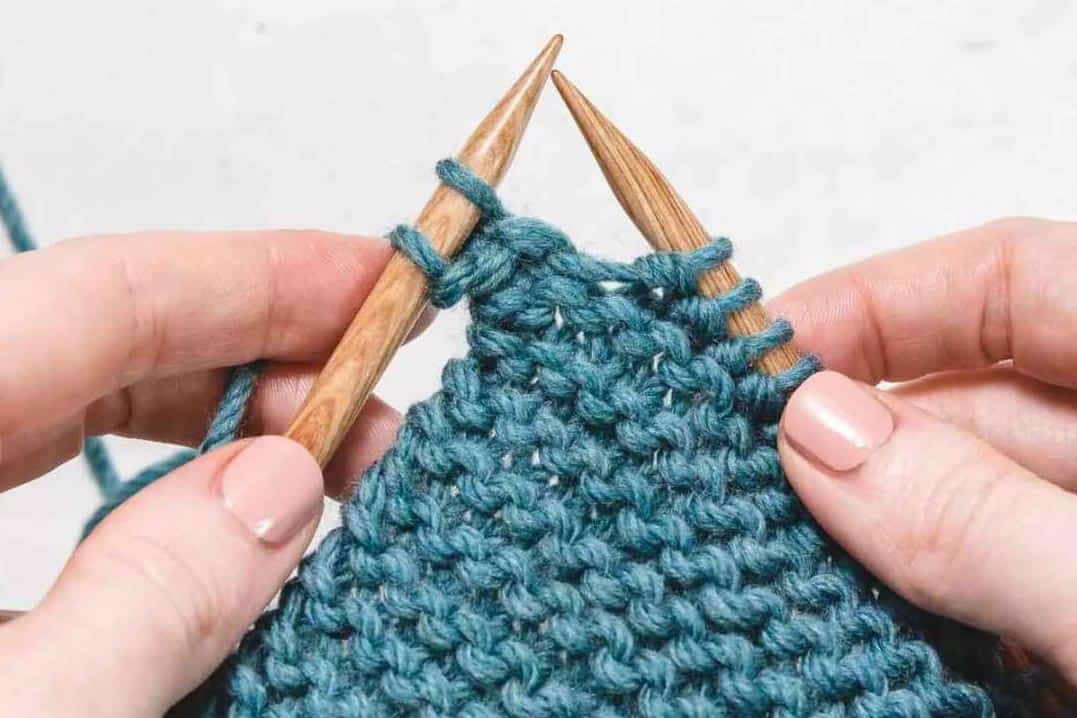
Cast Off
Just as you start your knitting project, you’ll also need to finish it. Cast off is the method you do to put an end to your stitches. Just like a cast on, you need to be careful and attentive when doing a cast off because if you mess it up, your sweater will have a loose part and might easily wear.
So to get you to end your stitches the right way, here is another guide from Sheep & Stitch that shows how to perfectly do a cast off.
Steps on Knitting a Sweater
Pick a pattern
Now that you know the basics of knitting and have decided that you want to pursue the hobby, you should look for a straightforward knitting pattern.
This is because when you are knitting, using a pattern will help you through each step of the process. There are many knitting kits you can buy with a pattern guide along them, so use this as your reference.
Get the right gauge
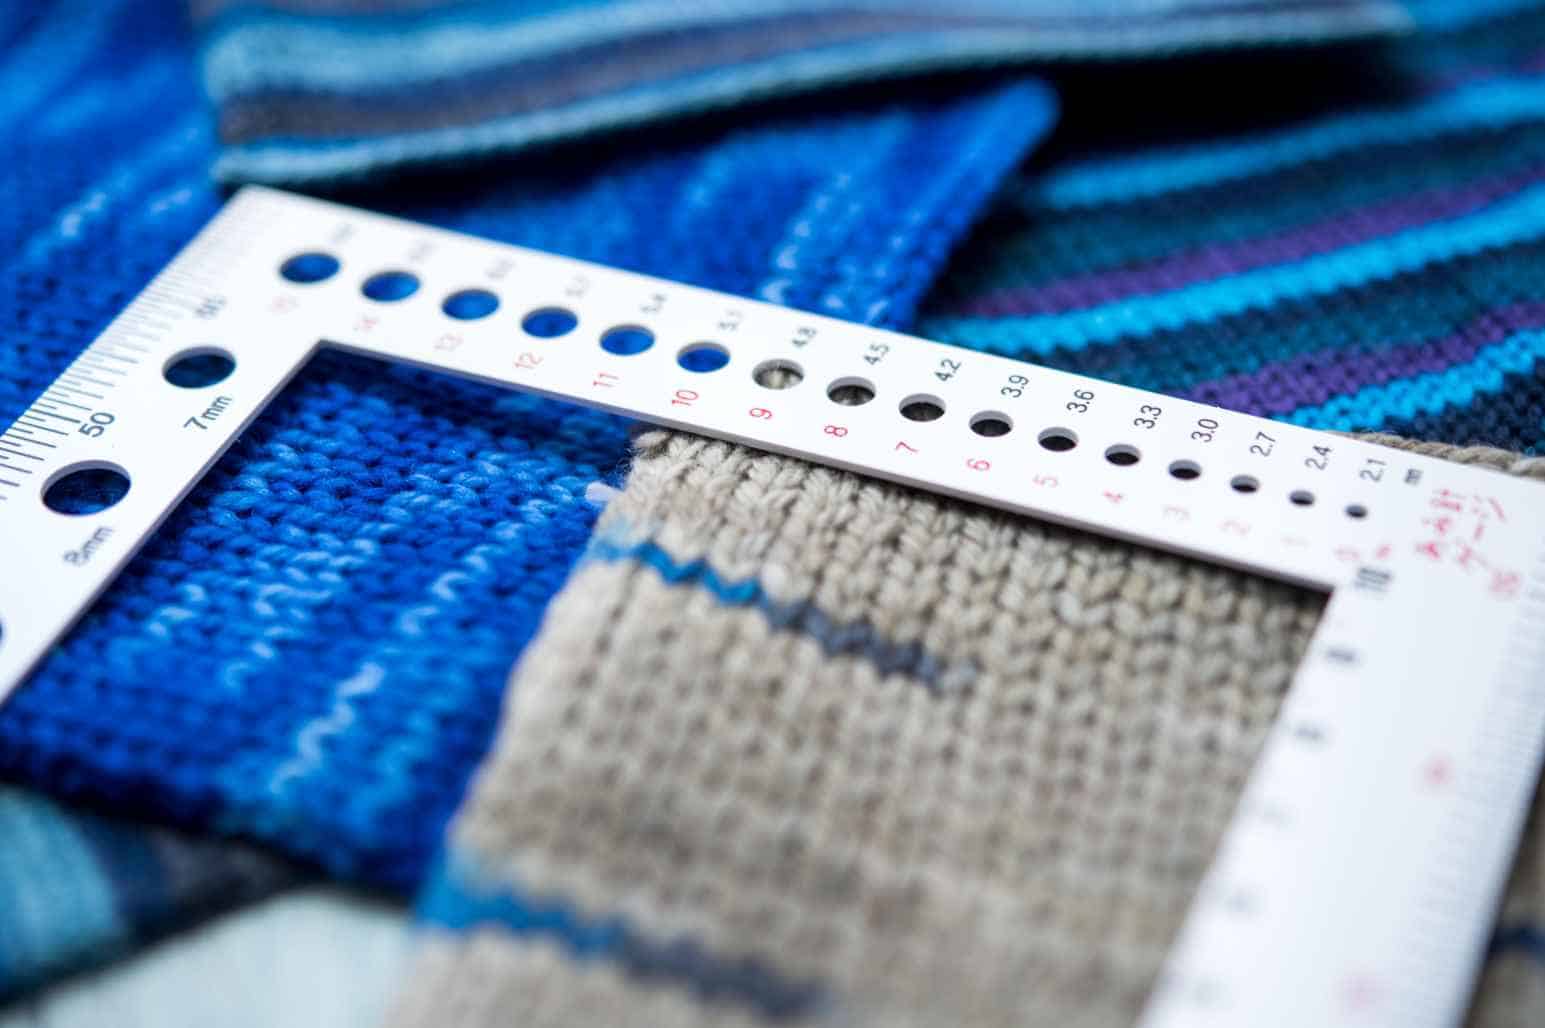
Basically, the gauge is the knitting tension, or how loose or tight you knit. For example, you followed a pattern online and even got the same materials and sizes the tutorial says. And the sweatshirt is supposedly a medium, which is your size.
So, do you think that following all of these will result in a perfect fit? Maybe, but mostly no. This is because the tutorial’s knitter might have a loose knitting tension, and you, on the other hand, knit tightly. Thus, your sweater might end up shorter and tighter than you expect.
So when knitting, make sure you have the right gauge so you don’t end up messing up your first sweater.
Have the right knitting tools

Before being all fired up and excited about doing your first knit, check first if you are complete with the essential tools you need for knitting. Make sure you have enough materials, especially the yarn, to have a full-size sweater. Below are the important tools you need to start your knitting project.
- Yarn
- Needles
- Stitch Marker
- Stitch Holder
- Scissors
- Tapestry Needle
Start Knitting the Collar
With the basics in place and the right gauge determined, it’s time to start knitting. But first, since there are many types of sweater construction, this guide is for a Raglan or top-down sweater because this is the best and easiest to do for beginners. And we’ll be using the Longtail cast on that we talked about earlier.
Most importantly, since a sweater is a delicate task to do, you’ll need a video guide so you can visualize the stitches or parts you need to do. So here is a video from Ashley that you can check before or while reading our guide.
Do a Cast On
To start making the collar for your sweater, do a cast on of the stitches you need for your sweater. The size will depend on the pattern you got because most patterns you can buy will have a full guide about the number of stitches you will need for a specific size. But for reference, you can make 56 stitches for a medium size sweater.
Make a Rib
Once you are done with the base for your collar, it’s time to make six rounds of a 1×1 rib. To do this, you need to purl and knit the existing stitches. To do this, you need to purl and snitch the existing stitches. For a visual reference, check this video out and easily do a 1×1 rib.
Divide the Collar Into Parts
Now that you have a solid collar for your Raglan sweater, you need to divide it into parts for the sleeves, the front, and the back. Given your 56 stitches, allocate 8 stitches for each sleeve and 20 stitches each for the back and front. To do this, since you have 56 stitches, you’ll need 8 stitches for the sleeves and 20 stitches for the back and front.
The stitch marker will come in handy for this part because you’ll be marking the stitches you do so you get the right number. The stitches will act as your guide or starting base for making the body and the sleeves of your sweater.
Increase your Raglan Rounds
After dividing your collar into parts, it is time to increase the number of stitches for 15 rounds. This will be the base for how loose or fit your sweater will be.
For this guide, you need to add 2 stitches for each of the 15 rounds. So if you will add 2 stitches on your sleeve, the next round will be 10 since you have a starting of 8 stitches. This will go on till you finish stitching,
Divide for the Body
Since you now have a collar with a solid rib, it’s time to divide it for the body. You’ll need a tapestry needle and scrap yarn for this one because you will be inserting the scrap yarn into the round for the sleeves to hold it.
As per the visual guide, connect the front and the back of the sweater by adding four cast on stitches on either side while leaving out the sleeves. Doing this will have your sweater finally look like a sweater because once you are done dividing the parts, you can visually see the holes for the sleeves and a connected front and back.
Knit the Body and Sleeves
After you divided the parts, you can now go on and knit for the body and sleeves. This is now an easy step since you only need to add a few rounds of stitches on the body and sleeves to make it long so you can finally wear it and see if the fitting is good.
YYou only have to knit and stitch for every round, and if you already added in about 10 inches in length, try it on and see how many more you should do to achieve the length you want.
Quick note
When you are knitting the body and sleeves, you will eventually be nearing the end of your yarn since a ball of yarn is limited and can’t possibly be enough to make a whole sweater. So, if you run into this, here is a quick guide on how to join a yarn’s end or skein, as knitters call it.
Complete a Bottom Ribbing
Once you have attained the right length for you, you can now add a bottom ribbing which will be the end of your sweater’s body. This bottom ribbing will take the same process as when you made a rib for your collar. For a good length, you can add six rounds of 1×1 rib and bind it off for a smooth finish.
Time for your Sleeves
After successfully completing the body, you can now knit the sleeves. Doing this will require you to remove the scrap yarn and insert your main needle again to continue knitting. You’ll be doing the same thing as you did for the body; just knit and snitch until you get the right length.
Decrease the Sleeves Cuff
Since you don’t want a shapeless and loose sleeve, you’ll want to decrease the cuff of the sleeves to get the perfect fit you want. You might think this step will be challenging, but it is actually easy.
To decrease the number of stitches, knit 1 stitch first and then knit 2 stitches together in the next one, repeating this cycle. What you need to do is to knit 1 stitch first and 2 stitches together for the next one, then the cycle goes on. So, in a nutshell, if you have done 42 stitches and reduced them using this cycle, you’ll have 28 stitches for the cuff.
Finish off the Sleeves
Now that you are done with the major knitting for the body and sleeves finish off the sleeve by adding a 1×1 rib just like what you did in the body. Add the same number of ribs as you did for the body to have identical ends.
Then, cast off the stitches to achieve a seamless sleeve cuff finish. Check your sweater and see if it looks good and if there are no loose ends. Make sure to also try it on and feel if it fits you perfectly the way you want it.
Conclusion
If you made it this far, then we believe you now know how to knit a sweater. So what’s next? Find the perfect pattern you want, and start making your first-ever knitted sweater! By following the steps above, you’re on your way to crafting a beautiful sweater!


Jessica Oliver is a fashion enthusiast with more than ten years of experience in the industry. She previously managed her own clothing store in New York before becoming a mother of three. With a passion for sustainability and a desire to share clothing care and recycling tips.